
It also makes the transfer to the hot pan a lot easier which allows me to not disturb all the wonderful bubbles that have formed in the dough during rising. Give it a try!

Sent from my iPhone

Sent from my iPhone
When I first started this blog my friend Sarah sent me a link to a recipe for a "No Knead Bread". I looked it over but it seemed almost too simple. I wasn't ready for that yet. I was having too much fun kneading my bread and letting it rise and kneading again! Months later I revisited the recipe and decided to try it out. The results are amazing and I haven't looked back! This is my bread of choice now!
Ingredients:
3 cups bread flour (I like Harvest King bread flour)
1/4 teaspoon instant yeast
1 teaspoon fine table salt (or 3/4 tablespoon of kosher salt)
1 1/2 cups warm water
Covered pot (five-quart or larger cast iron, Pyrex, ceramic, enamel...something that can go into a 450F oven.) I have invested in an enamel over cast iron, dutch oven, mine is the Costco version of a Le Creuset
Directions:
1. Mix dough: The night before, combine all ingredients in a big bowl with a wooden spoon until the dough just comes together. It will be a shaggy, doughy mess. Cover with plastic wrap and let sit 12-20 hours on countertop.

2. Shape & preheat: The dough will now be wet, sticky and bubbly. 
With a wet spatula, dump the dough on a floured surface. Fold ends of dough over a few times with the spatula and nudge it into a ball shape. You can use your hands if you like, just keep your hands wet so that the dough does not stick. Generously dust a cotton towel (not terrycloth) with flour. Set dough seam side down on top of towel. Fold towel over the dough. Let it nap for 2 hours. 
When you've got about a half hour left, slip your covered pot into the oven and preheat to 450F.
3. Bake: Your dough should have doubled in size. Remove pot from oven. Holding towel, turn over and dump wobbly dough into pot, using your hands to get the dough off the towel. Doesn't matter which way it lands. Shake to even dough out. Cover. Bake 30 minutes. Uncover, bake another 15-20 minutes or until the crust is beautifully golden and middle of loaf is 210F. 
Remove and let cool on wired rack. 
If not eating right away, you can re-crisp crust in 350F oven for 10 minutes. Best way to eat it? Smear a warm slice with some good butter.
Come on, it's gorgeous right?!! 
I have also experimented with skipping the step where you let the bread nap for 2 hours in a floured towel before baking. That produces a ciabatta type bread. Sometimes I'll sprinkle a little kosher salt on the top when I dump it into the hot pan, it gives the bread a great extra something when you eat it smeared with butter!
It's been a crazy holiday season with lots of shopping, wrapping decorating and of course bread baking. I didn't have time however to post all of my experiences here. Before the Christmas extravaganza began I found a recipe on allrecipes.com for hamburger and hot dog rolls. I just had to try it. I must say it was an amazing success. The rolls turned out so good. In fact they were so great that I actually made them as dinner rolls one night too. They are buttery and warm and light and fluffy. Truly wonderful. If you have a great burger recipe make these rolls and you're burger will be extraordinary!
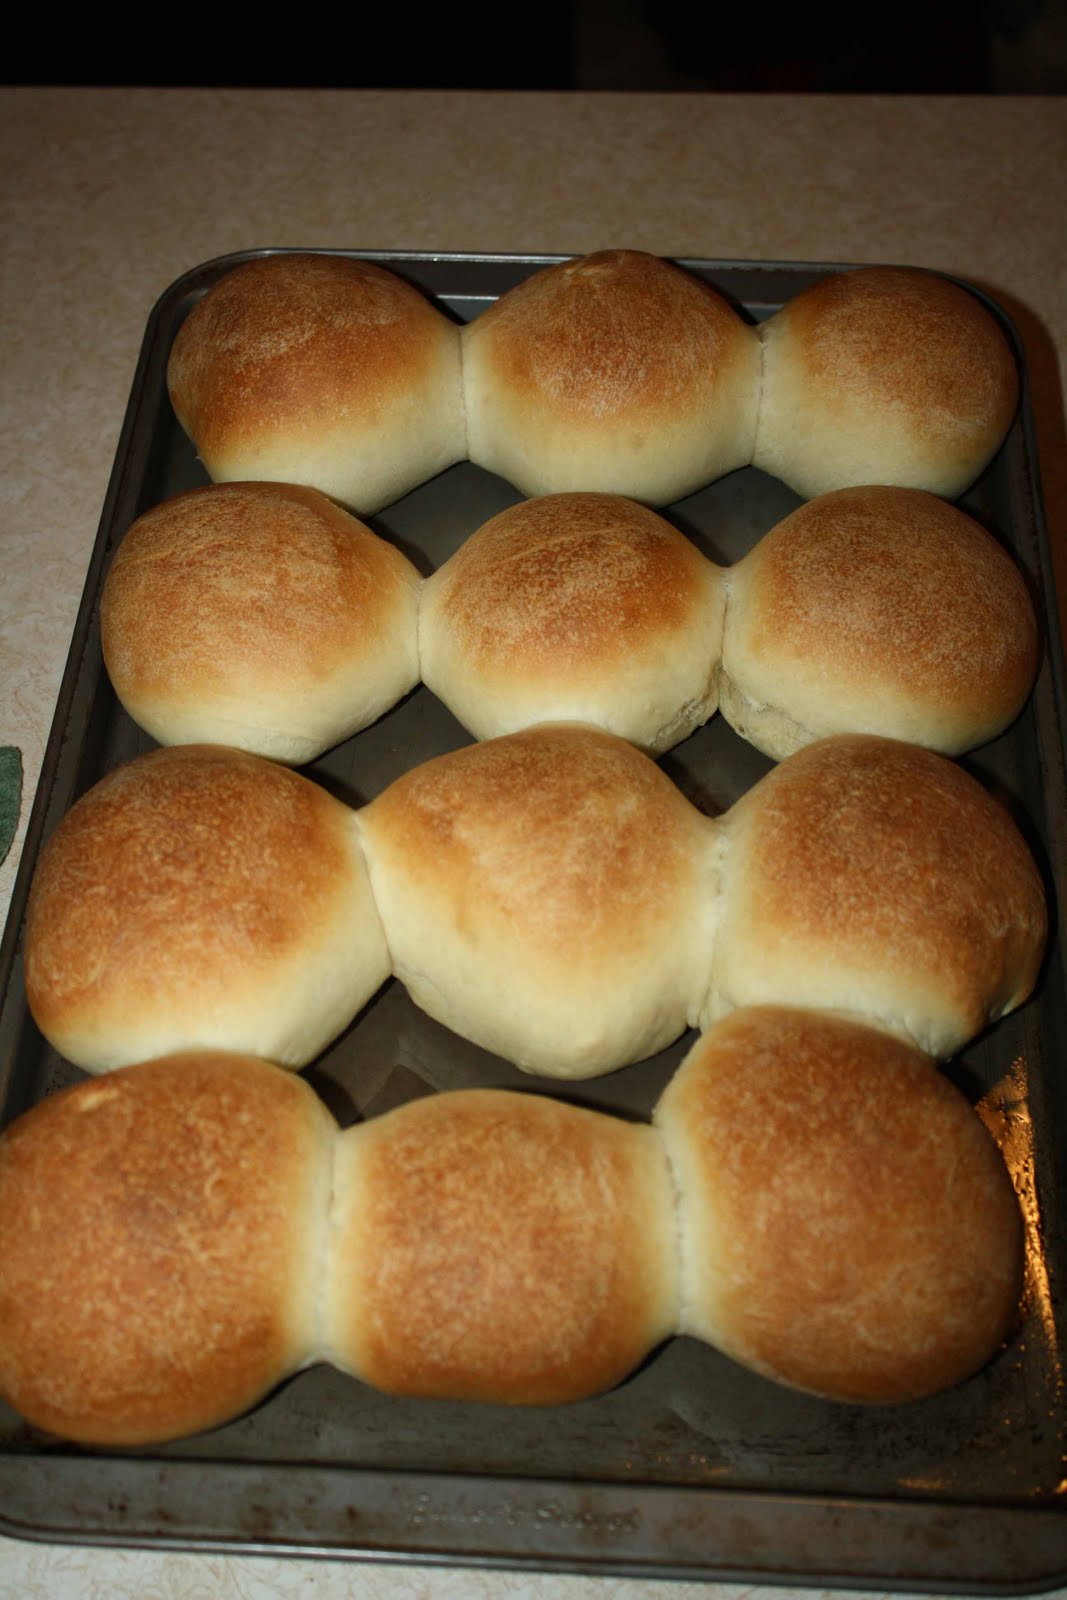
Ingredients
1 cup milk
1/2 cup water
1/4 cup butter
4 1/2 cups all-purpose flour
1 (.25 ounce) package instant yeast
2 tablespoons white sugar
1 1/2 teaspoons salt
1 egg
Directions
1.In a small saucepan, heat milk, water and butter until very warm.
2.In a large bowl, mix together 1 3/4 cup flour, yeast, sugar and salt. Mix milk mixture into flour mixture, and then mix in egg. Stir in the remaining flour, 1/2 cup at a time, beating well after each addition. When the dough has pulled together, turn it out onto a lightly floured surface, and knead until smooth and elastic, about 8 minutes. ( I just let the dough hook do the work in my Kitchen aid mixer)
3.Divide dough into 12 equal pieces. Shape into smooth balls, and place on a greased baking sheet. Flatten slightly. Cover, and let rise for 30 to 35 minutes.
4.Bake at 400 degrees F (200 degrees C) for 10 to 12 minutes, or until golden brown.
5.For Hot Dog Buns: Shape each piece into a 6x4 inch rectangle. Starting with the longer side, roll up tightly, and pinch edges and ends to seal. Let rise about 20 to 25 minutes. Bake as above. These buns are pretty big. I usually make 16 instead of 12.
I've been trying to do most, if not all of my cooking at home lately and on a budget. I typically feed 3 adults and 2 kids dinner for $5-$8. $10 dinners has nothing on me! I try to make sure my dinners are at least semi healthy also. I mean a person could feed a family of five Ramen noodles for dinner for under $1 but that wouldn't be very healthy! I also use my crock-pot a LOT since it means dinner is pretty much ready and waiting when I get home from work. Last night I made a Mexican chicken and beans in the crock-pot, it's sort of like an enchilada filling yum!
Crockpot Chicken with Black Beans and Cream Cheese:
Ingredients
2-3 boneless chicken breasts (mine are still frozen)
1 (15 1/2 ounce) can black beans
1 15 oz can diced tomatoes (or 1 large fresh tomato diced)
1/2 cup water
1 packet taco seasoning
1 (15 ounce) can corn
1/2 package cream cheese (most cream cheese comes in 8 oz bricks, you want to use 4 oz)
Directions
-Put frozen, yes, frozen, boneless chicken breasts into crock pot.
-Add 1 packet of taco seasoning, 1 can of black beans drained, 1 can of corn drained, 1 can diced tomatoes (or your fresh diced tomato) and 1/2 cup water
-Cook in crock pot on high for 4-5 hours or on low for 8-9 hours
-Break up the chicken, it basically falls apart into shredded chicken if you just poke at it with a spoon a bit
-Add 1/2 package cream cheese (just throw it on top!) and let sit for about 1/2 hour
- Stir it up and serve over rice or with tortilla chips or better yet with home made flour tortillas!
And so we get to the "bread baking" part of this post. I wanted to serve my Chicken and Black beans with flour tortillas, I was going to the grocery store so I could have picked up a package but I thought, hey I bet they aren't that hard to make; so I looked up some recipes and you know, they aren't hard to make at all!
Flour Tortillas

-Whisk the flour, salt, and baking powder together in a mixing bowl. Mix in the lard with your fingers until the flour resembles cornmeal. Add the water and mix until the dough comes together; place on a lightly floured surface and knead a few minutes until smooth and elastic. Divide the dough into 24 equal pieces and roll each piece into a ball.

-Preheat a large skillet over medium-high heat. Use a well-floured rolling pin to roll a dough ball into a thin, round tortilla. Place into the hot skillet, and cook until bubbly and golden; flip and continue cooking until golden on the other side. Place the cooked tortilla in a tortilla warmer; continue rolling and cooking the remaining dough.
It took a little time but it was pretty easy. I think cooking them until they are "golden" is not a great idea because they get kind of crispy which wasn't what I was looking for. My second time around I cooked them covered and on a lower heat and I was happier with the result. I did use lard because I happened to pass right by it in the grocery store but from the reviews I read you can totally sub in shortening. Then you won't have a package of lard hanging around your house. I need to hide it somewhere I hate opening up my cabinet and seeing it there, it just feels wrong! Anyhow the tortillas are great and I will totally be making these again.
I have been baking but haven't done much posting since all my bread seems to be coming out pretty much the same every time, and not all that great. Until the other night, when it came out absolutly perfect, and then I was able to recreate my success. So I have finally a recipe that works for me, and for my schedule. I make the dough late at night, leave it covered overnight in my cold kitchen (50-60 degrees) perform the 2nd mix in the morning before work, leave it covered in the fridge until I get home form work. When I get home at 5:30 I take it out and place it near my pellet stove for 2 hours, then I shape it, let it rise and bake bread at 10 at night! This recipe makes two medium size bread loaves.
Ingredients
¾ cup of a starter
1 tsp dry active yeast
2 cups all-purpose flour
2 cups bread flour
1 cup warm water (plus possibly a few more tablespoons)
3 tbsp olive oil (plus 2 more tbsp. for the outside before baking)
1 & 1/2 tbsp kosher salt
Directions-
Step 1- Make the dough
Combine the starter, 1 cup warm water, 1 tsp yeast, 2 tbsp olive oil and 2 cups of bread flour, mix in a Kitchen Aid (KA) mixer with a dough hook on low speed and slowly add in the 2 cups of all-purpose flour. Increase your mixer speed to medium and let it continue to run and watch to see if dough is forming into one large clump or if it is still staying crumbly and in pieces. If it hasn't come together begin adding 1 tbsp of water at a time and letting the mixer run a bit after each addition. When the dough comes together you have added enough water. Now add the 1 & 1/2 tbsp kosher salt to the dough, continue running the mixer for 8 minutes. Remove the bowl and cover with plastic wrap. Rise in a warm place for 3 hours or in a cool place overnight. Your dough should triple in bulk.
Step 2- 2nd mix
Put your risen dough back to mix on your KA mixer fitted with a dough hook. (I let mine rise right in the mixing bowl and then do this stage still in the same bowl) Mix your dough for 5 minutes. It will return to it's original small size since you are letting out of it (that's okay it's supposed to) Remove the bowl and cover again to let rise for 3 hours in a warm place. Alternately you can refrigerate it now and then take it out of the refrigerator and let it sit in a warm place for 2 hours. Ultimately you are looking for it to rise back to about 3 times its deflated size.
Step 3- shape and rise
Turn your risen dough out onto a floured work surface, fold and stretch your dough onto itself 4 or 5 times before cutting in half and shaping into loafs. Place on a floured cutting board and cover with oiled plastic wrap. Let rise in a warm place for 1 ½-2 ½ hours, no longer! Any longer and your bread will be overproofed, it results in really disappointing bread!
Step 4- bake
Preheat your oven to 500 degrees F. Transfer your bread to a corn meal dusted peel or easy to maneuver cutting board. Rub each of your loaves with a tbps of olive oil (don't try to oil the bottoms just tops and sides) Slash the tops of your loaves with a razor blade. Steam your oven. (Skip this step if you have an oven with electronic/digital controls, you could ruin it) Slide your loaves into the oven. Bake at 500 degrees for 8 minutes, then reduce temperature to 400 degrees F and bake an additional 8 minutes. Remove loafs and let cool on a wire rack. Try not to cut into it until it is cool. Pretty much an impossible feat one you smell this bread baking! Here is what mine look like

I was looking for a nice easy bread to try and I came across Julia Child's recipe for White bread. I LOVE my Baking with Julia cookbook so I figured this had to be good. Here is the recipe
2 1/8 cups water
2 tsp active dry yeast
2 tsp sugar
6 cups bread flour or all-purpose flour
2 tsp salt
¼ cup unsalted butter softened
1 Pour 1/2 cup of the water into a bowl and mix with yeast and sugar til foamy.
2 Let sit for 5 minutes until creamy.
3 Put the yeast mixture, rest of the water and 3 cups of the flour into the mixer with the dough hook.
4 Mix slowly until blended then add the rest of the flour.
5 Increase speed and scrape down the sides until the dough comes together.
6 (If it doesn't add a tbsp of flour at a time until it does.) Add salt and mix at medium speed for 10 minutes (or do half in mixer and half kneading) until dough is smooth and elastic.
7 Back in mixer add butter 1 tbsp at a time (dough may come apart, but mixing will pull it back together).
8 Turn dough out on lightly floured surface and shape it into a ball then place in a large buttered or oiled bowl.
9 Turn dough so it is completely coated in the fat, then cover in plastic for 45 minutes to an hour, until it has doubled in size at room temperature.
10 Butter 2 loaf pans.
11 Deflate the dough, cut in half and turn out onto a lightly floured surface.
12 Roll out into a 9 x 12-inch rectangle.
13 With the short end facing you, fold the dough into thirds like a sheet of paper to go into an envelope, creating a roll.
14 Pinch the seam closed, and pinch the ends enough so it will fit in the loaf pan.
15 Drop in the loaf pan seam side down, and repeat.
16 Cover the loaves with buttered plastic wrap and allow to rise again in a warm place (80°F) for 45 minutes, until they double in size.
17 Preheat the oven to 375°F and put the rack in the center of the oven.
18 Bake for 35-45 minutes until they are honey brown.
19 Immediately turn out of pans onto a rack to cool.
20 Once almost completely cool, they can be cut.
21 Store in a brown paper bag for a day or two.
22 Once cut, turn cut side down onto a cutting board and cover with a kitchen towel.
I followed the recipe to the letter with one exception. I never have unsalted butter in my house so I used salted butter and cut the amount of salt I added to the recipe in half.
I really enjoyed working with this bread dough, I was just imagining how great it would taste especially with butter in it! It rose beautifully and baked into a rather pretty loaf. I knew this would just be a standard white bread loaf so no expectations for anything "artisan" like. But still even with fairly low expectations I found this bread really lacking. It didn't taste like anything. Maybe it needed more salt, maybe I'm not used to a loaf that due to its quick rising times doesn't have time to really develop much flavor. I also didn't like the effect the rolling out and folding of the dough had on the final product. The inside was made up of a spiral of bread. When you cut it the darn thing unraveled. White bread is supposed to be great for sandwiches and toast. I couldn't successfully use it for either of those things! I think I will try some variation of this again but I wouldn't roll it out and I would definitely use more salt. Julia, I'm disappointed!
I pulled out my bread machine the other day because I like it for making pizza dough. I saved a piece of Friday night's pizza dough and later in the evening used it to start a bread dough in my bread machine. I went the starter route mixing the dough with only warm water and flour. The next morning I used that starter which had sat out overnight to make the final dough using ¾ cup warm water, 3 cups flour, 1 tbsp kosher salt, 2 tsp yeast, 1 tbsp sugar and 2 tbsp olive oil. I let it go the whole dough cycle in the bread machine and then transferred it to a bowl to rise another hour. Then Lily helped me stretch and fold it.

We let it rise in a warm place for 2 hours before shaping the dough. The loaves then rose another 2 hours before I steamed the oven and baked the loaves at 500 degrees.

It came out AWESOME! So yummy. The next day the crust was like leather but on the day it was baked it was wonderful! I need to remember to use my bread machine more often!

